


We entered 2019, it’s easier than ever before for anyone to start a blog and earn money.
With few basic resources and little guidance, you can have your own personal or professional blog within 30-minutes after you finish this article.
I’ll tell you every part of the process to avoid the common mistakes that stop most new bloggers do in their tracks.
Then, let’s get started.
NOTE:
If you’re curious about how much it will cost to start and maintain your blog, the simple answer is Rs.0 to Rs.2000/year. I highly recommend that you opt for paid domains and hosting, but you have the option to start for free. I recommend for you to start for free.
Why Start a Blog? How It Is Helpful For You?
When I first started this blog, my aims were simple.
I wanted to teach people how to start the blog and helpful ways to maintain their blog and earn money.
However, there are number of different reasons that you might decide to start a blog to earn enough money within a short span of time.
For example:
- A consistent blogging habit will make you a better writer.
- If you find the right niche(a specialized segment of the market for a particular kind of product or service) you can make a full time passive income.
- A high-traffic blog makes an excellent income within less time.
- You have more opportunity to share you knowledge and expertise to many people.
- You can make important connections and grow your network in different parts of the world.
- And it’s FUN!
There are many benefits of blogging that you will understand when you start a blog. All I want you to say is:
"Blogging is amazing and it has the power to change your life in great way"
Believe That!!!!!!!!!
Step 1: Decide – Create Free Blog or Self-Hosted Blog?
As I mentioned in the introduction, starting and maintaining an average sized blog will cost between Rs.0 and Rs.2000 a year.
So yes, you can start your blog for absolutely nothing, however–as with most things in life–just because you can doesn’t mean that you should.
Let me tell you....
Yes, you can create a blog for free on many different platforms, such as:
- blogger.com
- wordpress.com
- etc…
But before you going to click the above links and “sign up”, read the rest of this section!
Sure, these platforms are great for expressing the some of the ideas you might have regarding content and design.
However, if you are serious about starting a profitable and successful blog, you should avoid these platforms at all costs.
Here’s why:
These “free” blogging platforms have limitations and totalitarian authority over your content.
They are, first and foremost, businesses. And their only purpose is to turn a profit by using your website to sell ad space and placing enough limitations on your account that you are eventually forced into a “premium” or “unlimited” blog plan.
Plans that are, more often than not, wildly overpriced and woefully under-equipped.
Without their expensive up sells, your account will be limited to a paltry few–and very generic–number of designs from which to choose, a “maximum” number of daily visits, limited storage, and all but nonexistent customer service.
And let’s not forget that these platforms have total control over your content.
So if you post something that one of your friendly neighborhood website moderators doesn’t like, your entire site (and all of your data) can be deleted in an instant.
Just think about that for a second…
You spend months to grow your blog. Slowly but surely you acquire a decent number of loyal visitors and subscribers. Then, the money starts to roll in, from sponsored posts, paid ads, or your own products.
Things are going great.
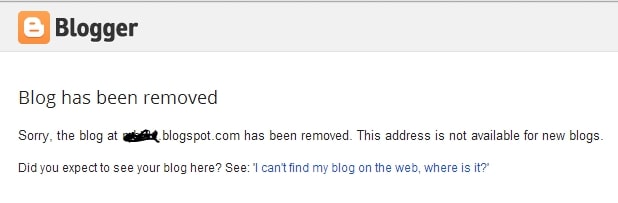
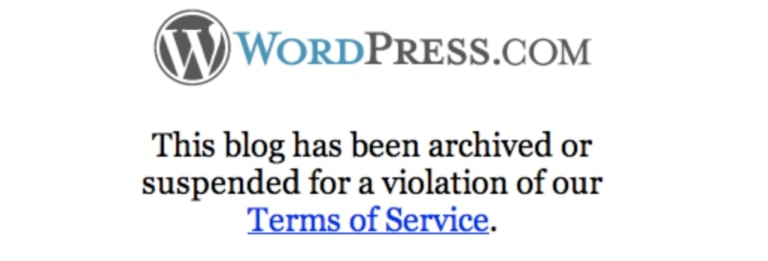
And then you unknowingly violate your free web provider’s Terms of Service (see all limitations for Blogger.com and WordPress.com) and your entire online business is lost to the trash bin of the interwebs.
Or
Do you really want to deal with this?
NO! NO!! NOOO!!!!
This is why all of the most successful bloggers started their own self-hosted blog.
It’s cheap, grants you access to your own personal domain name (e.g. mysite.com vs. mysite.blogging-platform.com), and you’ll have no limitations.
Oh, and you’ll also have access to premium website templates and design plugins to ensure that your new site looks like something created by a pro.
All I want to say is:
To get start your blog in the right way. So, that your struggle will not go in get wasted.
A few months from now, you’ll be glad that you did.
Step 2: Get a Domain Name, Web Hosting & Setup Your Blog
Alright, with all of the anti-free-blog preamble out of the way, it’s time to get down to the good stuff and go through the exact steps that you need to build and launch your self-hosted blog.
To get started, you’ll only need two things:
- A Domain name – The web address of your blog (EX: www.blogger.org)
- Web hosting – A server to store your blog files and keep it online for others to browse and read at all times.
And with a few clicks you can purchase and setup both of these things as easy as it.
1. Sign up with Web Hosting
Full disclosure: To keep site up and running many use affiliate links for some of the products mentioned in this guide. This means that they earn a small commission (at no extra expense to you) anytime that you make a purchase using one of the links. Thank you for your continued support!
Of the countless web hosts on the market, only a small handful are even worth considering.
Of those, only 3-4 offer truly exceptional services for the price.
Not only do they power more than 2,000,000 websites worldwide, but all of their packages come with a 30-day money back guarantee, exceptional 24/7 live support, and a free SSL certificate (+ bonus).
Oh, and they also offer one click installs, making it dead simple to get your blog launched in a matter of minutes.
Simply click on the “Get Started Now” button and choose a domain name.(Links are provided above)
2. Choose a Domain Name
Unlike many of the more web hosts that will charge you for a new domain, These web hosts gives new customers a free domain name for the entire first year of their web hosting service.
If you’re serious about building a strong online presence and visitors from all over the world you’ll want to get a domain name with a .com, .net, or .org, extension.
For those of you who are unable to claim your first choice of domain name, spend a few hours for ideas with friends and family. Think out loud and experiment with different words and variations to find the best suited domain name for your new site.
3. Choose Web Hosting Plan and Finish Your Registration
Now that you’ve decided on your domain name, it’s time to select your web hosting plan, finish your registration, and begin your beautiful world of blogging.
Once you’ve chosen the plan that best suits your needs you can finish off your registration and checkout using a credit card or PayPal.
And there you have it! You are now ready to launch your blog instantly (instead of waiting 2-3 days for activation like you would with many of their competitor’s).
4. Setup and Launch Your Blog
Once you’ve completed the registration process, it’s time to setup an admin panel (or cPanel) password–make sure it’s as strong as possible to keep hackers at bay–and login to your admin panel.
Once you are there, you should be able to see this screen:
Congratulations! If you see this, it means that your blog is already setup.
However, there are a few things that I’d recommend you do to ensure that it’s visible as soon as possible…
- Go to Settings > General (left sidebar)
- Add Site Title and Tagline (your blog name and tagline)
- Change your site address to your domain name.
- Add your email address (so you can reset your password later)
Once you’ve completed this, launch your blog.
Now that you’ve launched your blog, you’ll be able to see–what can only be described as–a skeleton of a website.
And this is where it gets fun.


)
0 Comments